Recently I’ve bought a domain via AWS Route 53. I wanted to set up incoming e-mails redirection from that domain into the existing e-mail server.
In this text, I’m going to show you how you can redirect your incoming e-mail messages with Route 53 for free.
At first, I was looking for two-way redirection, which will allow me to send e-mails from those addresses.
Hosting an e-mail server wasn’t an option. I was thinking about doing it with GSuite but then I decided that one-way redirection (incoming mails only) would be enough in my case.
Using ImprovMX
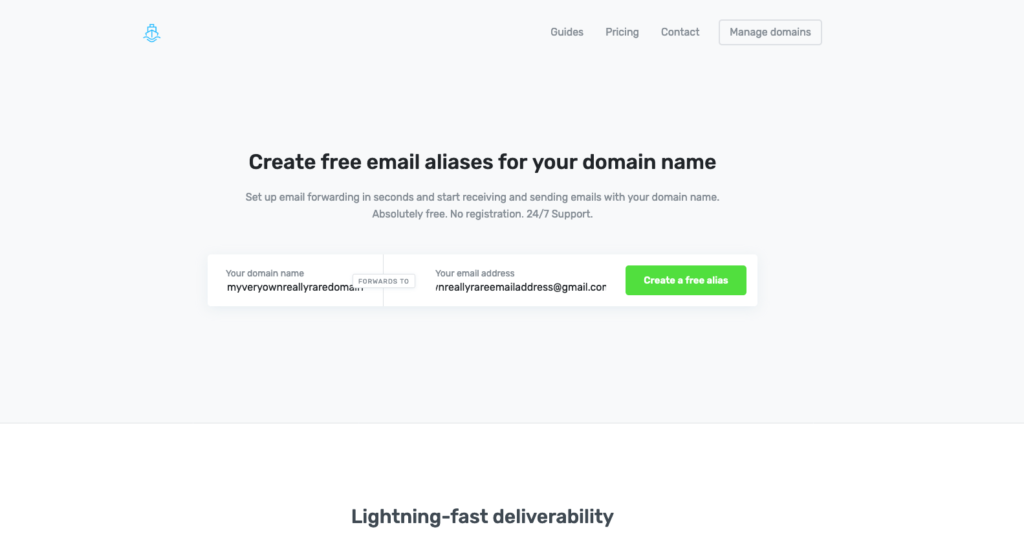
In order to achieve this redirection, I decided to use a free service called ImprovMX. It allows you to redirect incoming e-mails using DNS MX records.
Setting things up
The setup process is really easy and quick.
- At first, you have to specify your domain name and target e-mail address.
- Now, you have to confirm the e-mail address.
Route 53 setup part
Now it’s time for the Route 53 part of the configuration. In order to handle the redirection, you’ll need to create 2 DNS records in your hosted zone.
- Go into Route 53 service in the AWS console and choose your hosted zone (your domain).
- Click the button Create Record Set to create a new DNS record.
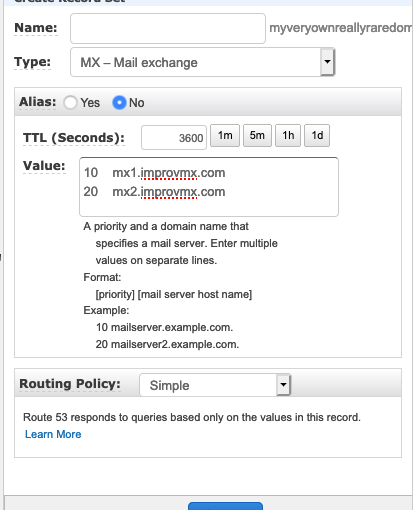
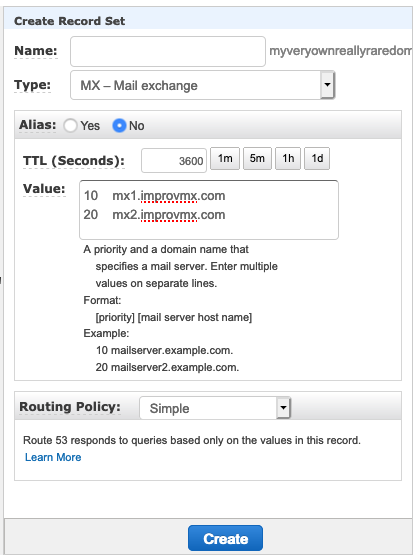
- Choose the type of MX – Mail exchange.
- Change TTL (Time To Live) value into 3600 seconds.
- Paste the following text into the Values field:
- Leave the routing policy as Simple (the default one) and click the Create button.
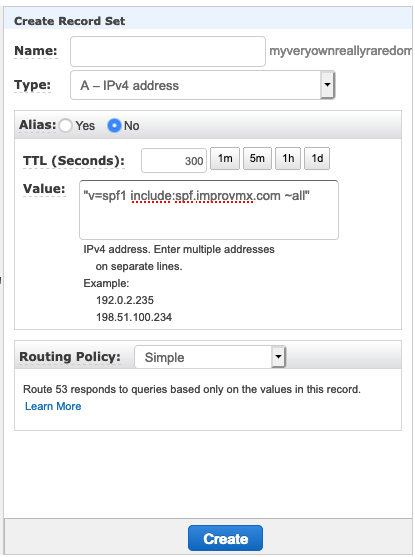
For SPF support purposes you have to add another DNS record – a TXT one.
- Again, click the button Create Record Set to create a new DNS record.
- Choose the TXT – Text type
- Paste the following text into the Value text box:
- Don’t change anything else (leave TTL and Routing Policy on defaults)
- Click the Create button
Test it
And that’s it. Let’s wait for a while for DNS changes to be propagated and you’re ready to go. You can test your redirection by sending an e-mail to yourself.
As simple as this.
Future improvements
If you want to change or customize your redirections you can do it via the ImprovMx console.
From there you can manage specific aliases and redirections as well as add the new domains.
Security concerns
The main concern you might have is the security side of that service. Do they store the information on their side?
Well, ImprovMX claims to be secure and anonymous. They’re not storing the e-mail content but they certainly log some kind of information.
Please take a look here for the details.
Conclusion
The tool I used for redirection in this text can allow you to redirect every e-mail sent into your domain.
By default, it redirects everything into destination e-mail address but you can change it easily via the console. In the simple use cases, this approach is okay.
The solution doesn’t work at a rapid speed but I’m aware of it and I didn’t expect it to be highly efficient.