Integrating Google Analytics stats with your Angular application is easy. Well, maybe it’s not as easy as it is for non-SPA websites but still it’s possible to do it really quickly.
In this short tutorial, I’m going to show you how you can connect your Angular app to Google Analytics in the 3 easy steps.
Prerequisites and preparation
For the beginning you’ll need 2 things already set up to get started with Google Analytics integration:
- Google Analytics property
- Angular application (in my case it’s Angular 11)
Add the script
The first step is to add the script data into your main application template file meta tags.
Get your property tracking code from the Google Analytics console and delete the gtag('G-YOUR-GOOGLE-ID') part.
Please remember to replace all of the G-YOUR-GOOGLE-ID with your own unique property id.
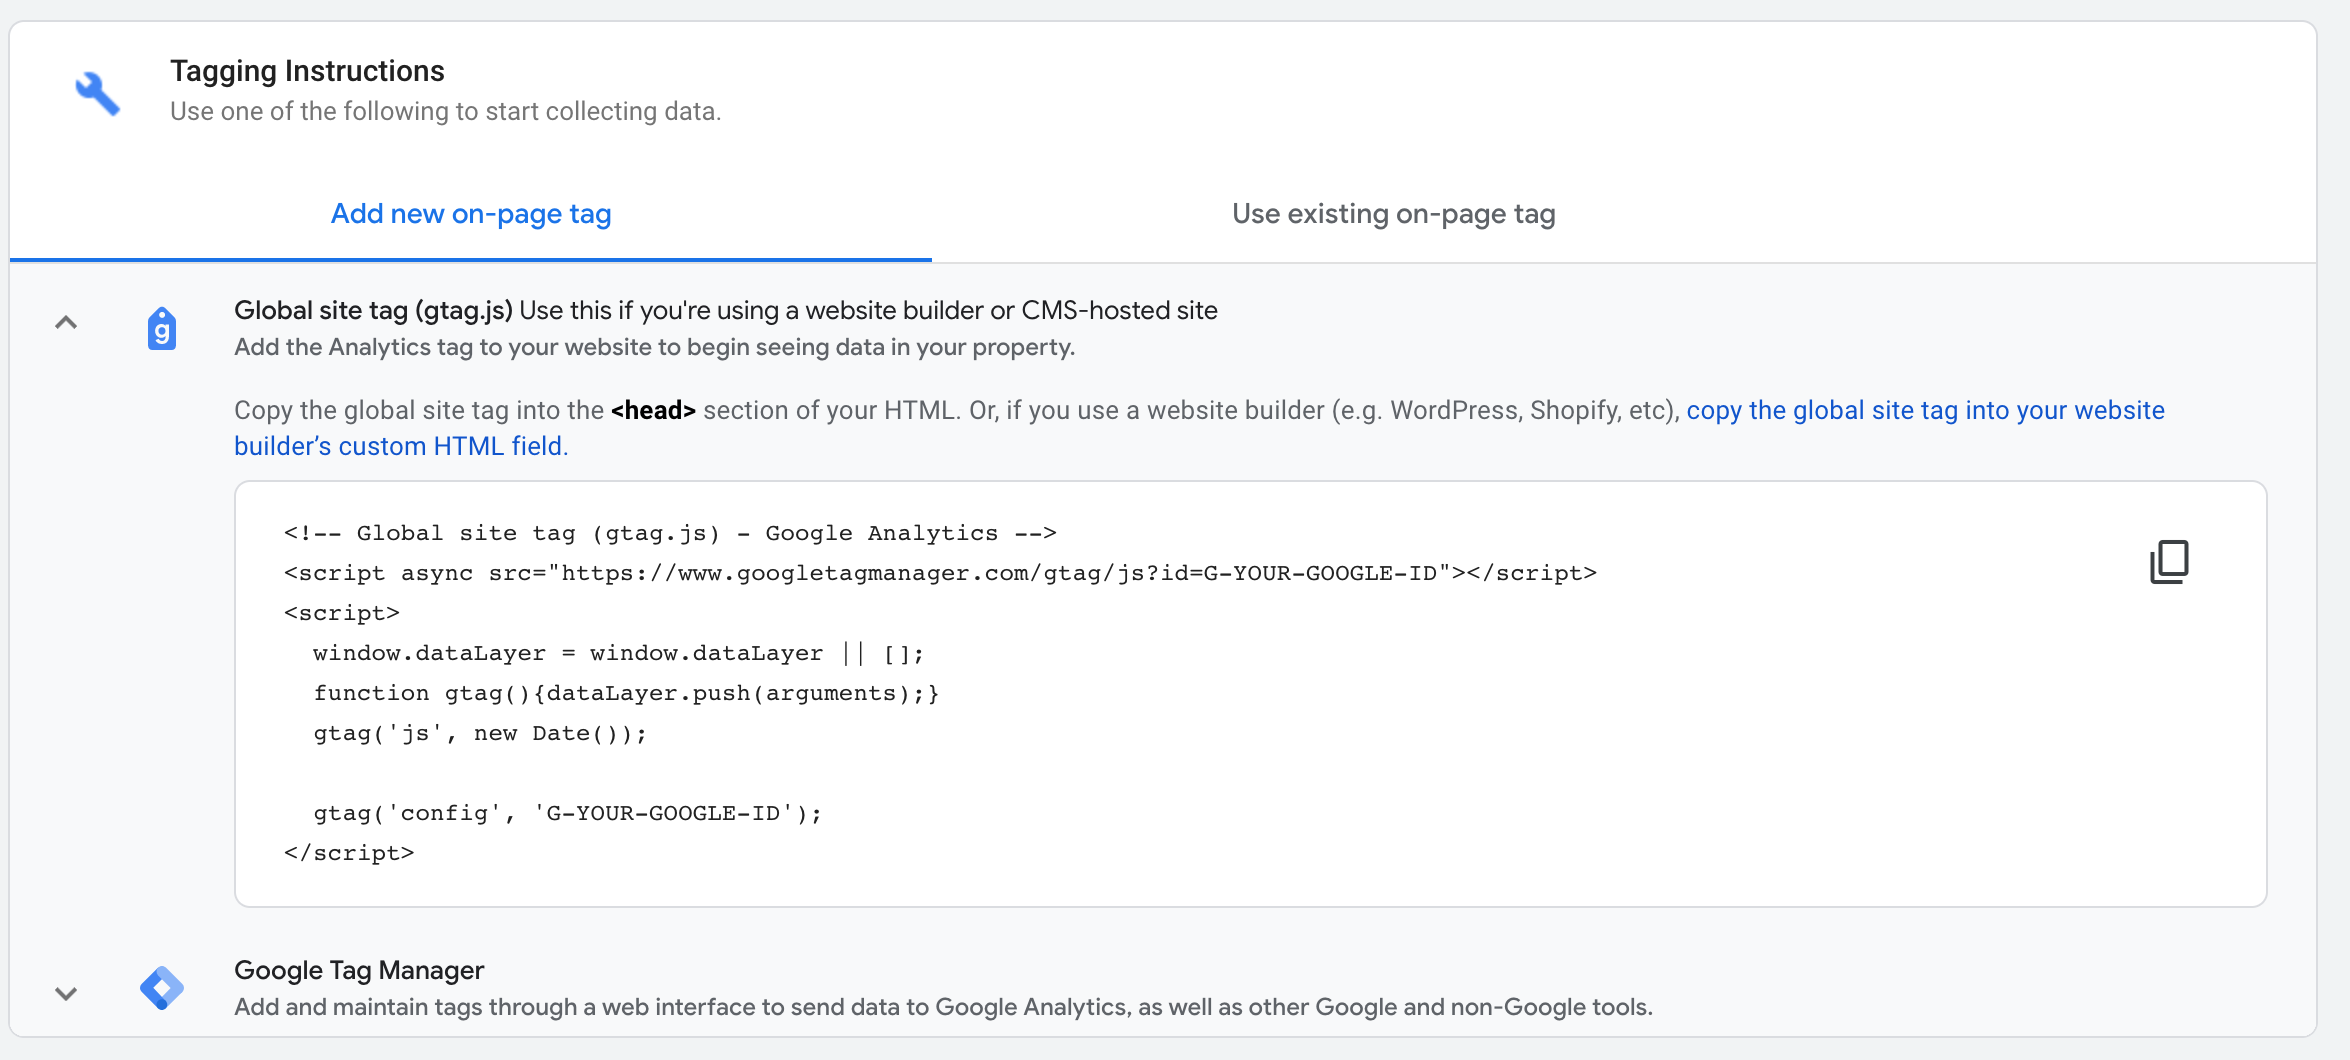
Add it into the src/index.html file:
Set up tracking
Now, let’s move into the AppComponent. Our goal is to subscribe to the router events and track every NavigationEnd event. It is an Angular Router event that is triggered every time when navigation ends successfully. At this point, we’d like to trigger Google Analytics.
Getting into app.component.ts. At first, we’ll declare gtag property:
Then add this tiny setUpAnalytics method, which will be invoked on ngOnInit:
As you can see, the method contains the gtag part we previously deleted from the <script> code snippet.
So, as a result, the app.component.ts file should look as follows:
Please note that we don’t have to unsubscribe from the Router events observable.
Testing time
That’s it. You’re basically ready to start tracking.
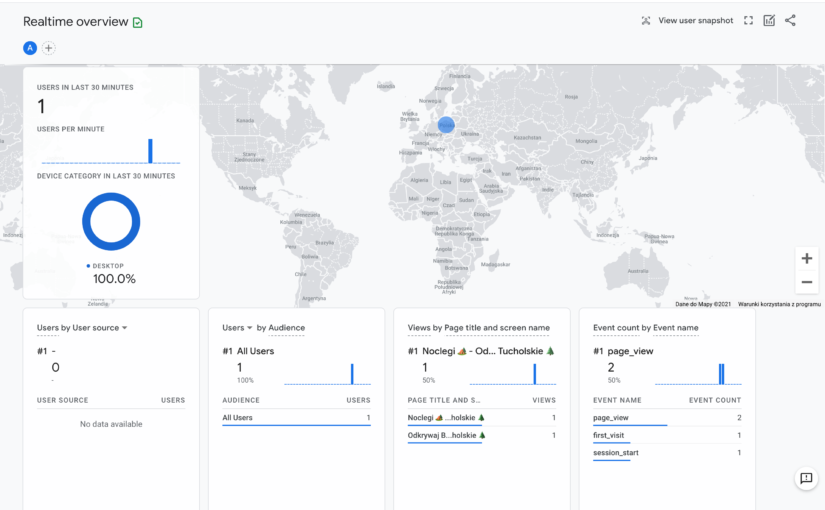
The last step is to run your application and check your Google Analytics console.
At this point, you should receive the hits from the users. After running your application and browsing into the. Go into the real-time overview and check if you’re able to see your requests.
You don’t need to deploy your application to achieve that, it should work fine on the local build of your Angular application (ng serve).

Troubleshooting
When the console is not receiving any hits
Please remember to turn off the adblocking plugin in the browser to be able to test your setup.
TS linter issues with gtag function variable
If you’ll get linting troubles with that part, you can relax your tslint.json config:
Or annotate the gtag variable with tslint comment flag.
Conclusion
As you can see, the basic integration of Google Analytics is really easy. With 3 easy steps, you’re ready to go with the default Google Analytics setup, which is enough for the typical use cases.
However, this text doesn’t cover advanced features of Google Analytics (like event goals, etc.). If you need them, please visit Google Analytics docs to learn more about integration.
Please note that we don’t have to unsubscribe from the Router events observable.
Why is this so ?
Hi Rashika, thanks for your question 👋
Please check this SO answer to get more details.
I’ve followed above steps and am able to see data in the report but no screen specific data available yet.
I’m using hashed routing in an Angular app, where URLs look like:
1. /application_name/#/login
2. /application_name/#/home
3. /application_name/#/userProfile
In the case of updating the title tag, please note that if you update the title after the API call, the page title in analytic will not update!
I tested this way and noticed that.
then I added this line after the API response
gtag(‘config’, ‘G-YOUR-GOOGLE-ID’,
{
page_path: event.urlAfterRedirects
}
);