In this blog post, I’m going to show you how can you set up the simple CI/CD pipeline for the Angular app.
The goal was to build the GitHub-based Angular project automatically with Travis CI and deploy it into an S3 bucket, which is used to host a static website.
Let’s begin and learn how you can set it all up yourself.
Tools & costs
In this case, Travis CI is a building tool of choice because of its seamless integration with GitHub, where the project’s codebase is stored.
BTW, Travis CI is free when the project is open source.
When it comes to deployment and hosting, Amazon S3 seems to be an interesting hosting option for the Angular application (and it’s possible to do it using the static website hosting feature).
And, last but not least, when it comes to hosting costs, if the project is small enough, then AWS Free Tier should handle it.
Preparation
In order to make it work, the environment has to be prepared first (but I won’t go deep into details here).
So, the following steps will be required:
- Create a separate IAM role dedicated to your CI/CD environment.
- When it comes to permissions, you can set your own policies but the most useful will be AmazonS3FullAccess.
- Select Programmatic Access and save your credentials, we’ll need them later.
- Create a bucket with public access to read the files.
Set your Bucket Policy to:
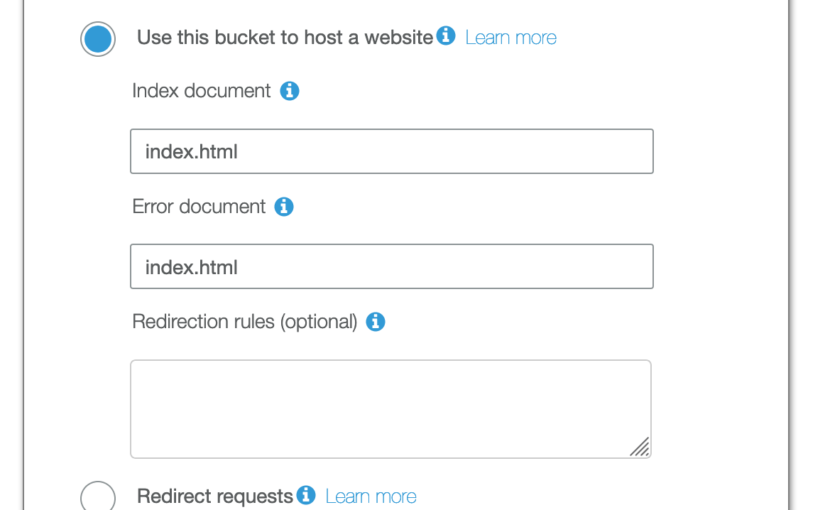
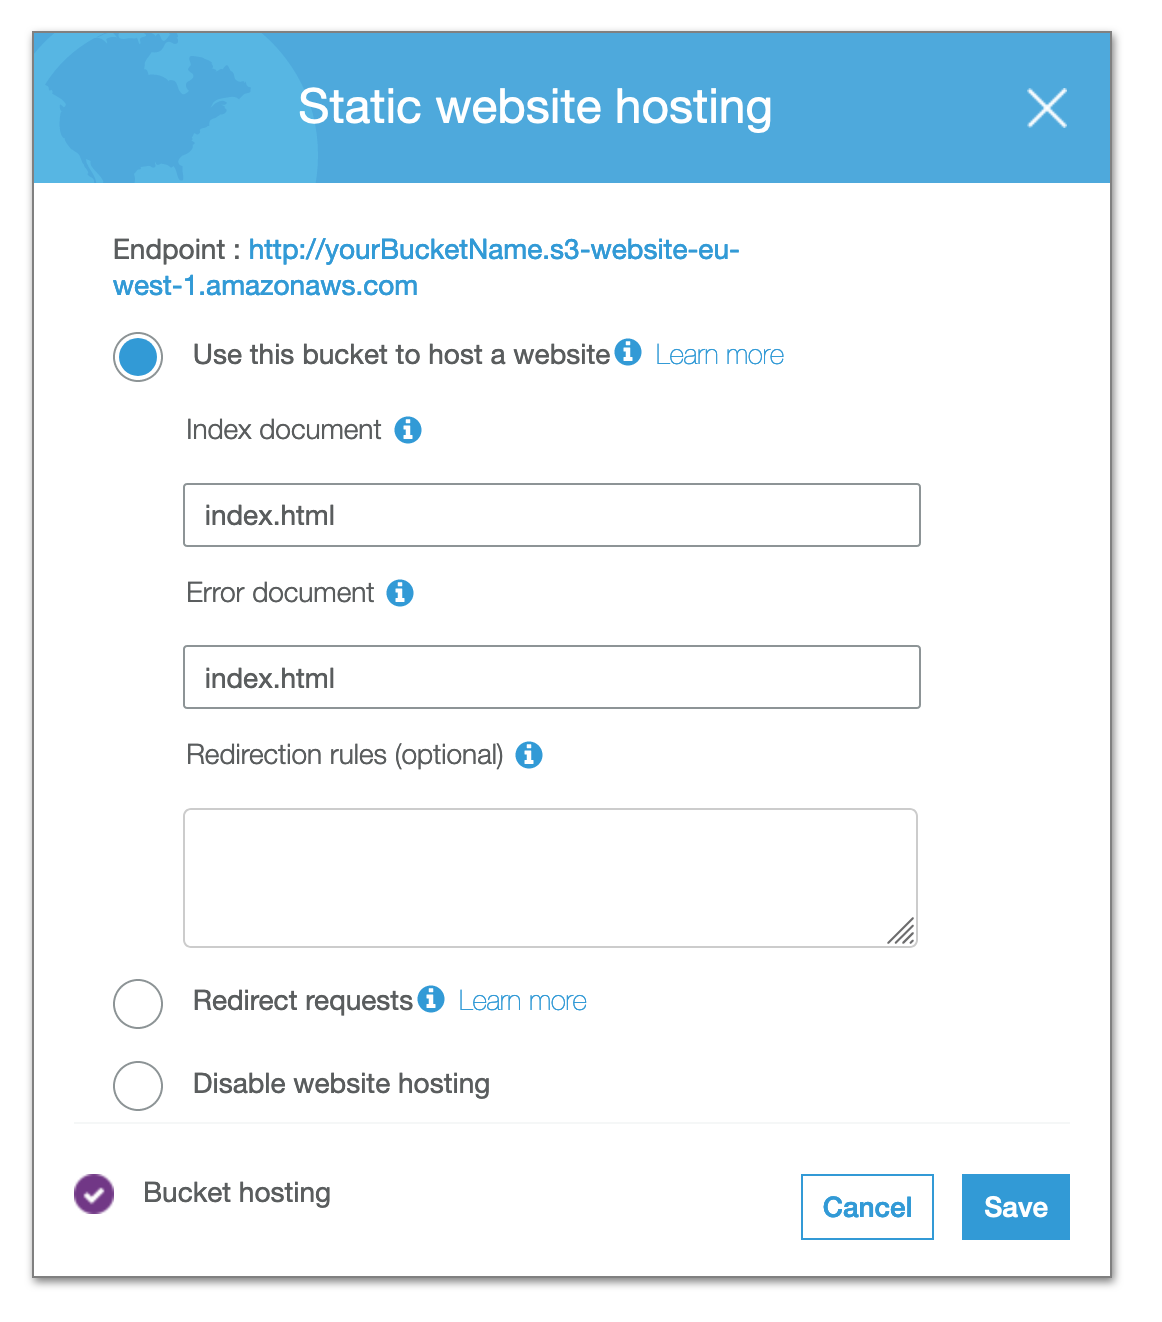
- Set up Static website hosting for the S3 bucket (under the Properties tab)
- Integrate your GitHub account with Travis CI
Config
Once the GitHub account is integrated with Travis, you need to create .travis.yml config file and place it in your repo.
In our case the content looks like this:
Basically, it’s pretty straightforward, but let’s describe the most important parts here:
- The build will run only on master branch commits
- Before the actual app build, it installs the freshest Angular CLI version via the npm
- The actual Angular application build contains just ng lint and the ng build –prod (with proper base-href parameter) commands to keep it simple
- S3-related fields:
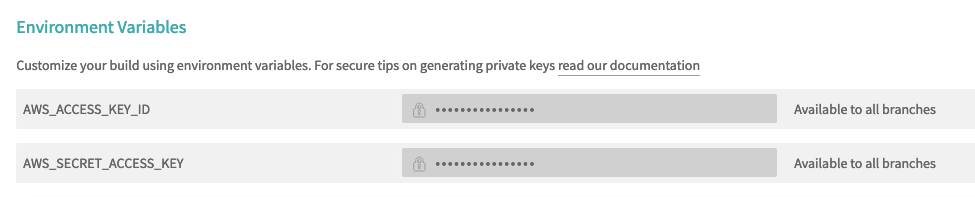
- access_key_id – IAM user programmatic access code
- secret_access_key – IAM user secret access key
- IAM user credentials have been passed using environmental variables. They can be set up in repo Settings in Travis:
- IAM user credentials have been passed using environmental variables. They can be set up in repo Settings in Travis:
- bucket – the name of your bucket
- region – the name of the bucket’s region
- skip_cleanup is for avoiding cleaning up the actual build files, we need to push them into the S3 though 😉
- local_dir – specifies the folder that will be sent to the server. Because we don’t want to send everything there
- notifications with slack stand for Slack integration. It sends notifications on the Slack channel after every build (successful or not). If you don’t need it you can delete it. If you’d like to use it you can configure it here
Note for GitHub users:
If you’re running your code on GitHub, you can expect your build to be ignored and to get such a message during the build:
“Skipping a deployment with the s3 provider because this branch is not permitted”
This is related to the recent changes in the GitHub. From October 2020 all the new repositories are using main as the main branch instead of master.
In order to make it work, you need to change master to main in a config and add additional clause to the deploy in order to make it work:
Conclusion
I hope this blog post will help you with setting up your own CI/CD pipeline based on Travis and S3 bucket.
For sure it will speed up your development so it’s worth trying. What’s important – it costs nothing to set it up, so it can be a good option for smaller projects.
Good luck!
Resources